Vinyl Graphics: Nailing That Perfect Look Without the Headaches
A step-by-step guide to applying vinyl graphics like a pro—from surface preparation and tool selection to bubble removal and finishing techniques.
Key takeaways
- Clean surfaces with isopropyl alcohol (70%) before applying vinyl—any dust or grease will cause bubbles and lifting.
- Hold your squeegee at a 30° angle and use overlapping strokes for consistent adhesion without wrinkles.
- Apply vinyl in temperatures between 59°F and 81°F (15°C–27°C) for optimal adhesive activation.
- Use a felt-edged squeegee on delicate finishes to prevent scratching.
- Heat helps vinyl conform to curves and activates adhesives—but avoid overheating.
Ever applied a window decal or vehicle graphic only to end up with a bubbly, wrinkled mess? Vinyl graphics can transform your storefront, vehicle, or signage—but getting them on correctly takes more than enthusiasm. The difference between professional results and frustrating do-overs comes down to preparation, technique, and the right tools.
Whether you are applying car window decals or large-format signage, these methods will help you achieve clean, durable results every time.
Why does surface preparation matter?
A clean surface is non-negotiable. Any dust, grease, or residue trapped under the vinyl will cause bubbles, lifting, or premature failure. Industry professionals recommend cleaning with 70% isopropyl alcohol and a lint-free microfiber cloth—this removes contaminants without leaving residue that household cleaners can deposit.
According to Coverstyl's vinyl application guide, surface energy—the adhesive's ability to bond with a surface—depends on cleanliness, adhesive quality, and environmental conditions. A properly cleaned surface dramatically improves adhesion strength and longevity.
For textured surfaces like wood or lightly corroded metal, light sanding before cleaning creates a smoother bonding surface. Always allow the surface to dry completely before application.
What tools do you need for vinyl application?
The right tools make a significant difference:
- Squeegee: The most important tool. Felt-edged squeegees prevent scratches on delicate vinyl finishes (chrome, matte, gloss), while hard-edged squeegees work well for final smoothing.
- Transfer tape: Essential for positioning cut vinyl lettering and graphics accurately before final application.
- Heat gun or hair dryer: Heat helps vinyl conform to curves and activates adhesives. A heat gun offers more control; a hair dryer works for smaller projects.
- Precision blade: For trimming excess vinyl cleanly. Replace blades frequently—dull blades tear rather than cut.
- Measuring tape and level: Alignment matters. Measure twice before committing.
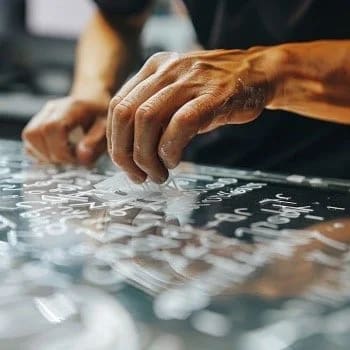
How should you hold the squeegee?
Squeegee technique has a bigger impact than most people realize. According to Elite Wrappers' professional guide, holding the squeegee at a 30° angle—never 90°—lets you apply consistent pressure without compressing the vinyl into wrinkles.
Work in overlapping strokes from the center outward. This pushes air and moisture toward the edges where it can escape. Never curl down at the end of a stroke—this creates uneven pressure and can trap bubbles.
For large graphics, apply the top section first, then snap the vinyl up to your application line. Lift about half an inch of the applied section to verify alignment before proceeding.
What is the best temperature for vinyl application?
Temperature affects how vinyl behaves and how well the adhesive bonds. The ideal range is 59°F to 81°F (15°C to 27°C). Outside this range, you risk adhesive failure or material distortion.
In cold conditions, the adhesive may not activate properly and the vinyl becomes stiff and difficult to work with. In high heat, the vinyl can overstretch or the adhesive may activate prematurely, making repositioning impossible.
Humidity matters too. High humidity can cause bubbling, while very dry conditions can create static that attracts dust. A controlled indoor environment produces the most consistent results.
How do you fix air bubbles?
Even careful application can result in some bubbles. Here is how to handle them:
- Small bubbles: Prick with a fine needle or pin, then smooth with your squeegee. The air escapes through the puncture, and the vinyl lies flat.
- Large bubbles: Gently lift the vinyl from the nearest edge—do not pull from the center, which can stretch the material. Reapply using overlapping squeegee strokes.
- Stubborn bubbles: Apply light heat to soften the adhesive, then smooth with a felt-edged squeegee.
Premium vinyl materials often include micro air-release channels that allow small bubbles to escape on their own within 24–48 hours.
How do you apply vinyl around curves and edges?
Curves and recesses are where many applications fail. The solution is heat combined with patience:
- Apply the flat portions first, working toward the curve.
- Warm the vinyl with a heat gun (not too hot—you should be able to touch it comfortably).
- Use a felt-edged squeegee to work the softened vinyl into the curve using short, overlapping strokes.
- Stretch strategically—some stretching helps the vinyl conform, but overstretching thins the material and can cause failure.
For deep recesses, make relief cuts to reduce tension, then overlap the edges slightly for a clean finish.
What finishing steps ensure durability?
After the vinyl is applied:
- Heat the entire surface lightly to activate the adhesive fully. This is especially important in cooler conditions.
- Trim excess material with a sharp blade, cutting at a slight angle away from the edge for a clean line.
- Apply edge sealer to exposed edges in high-stress areas (vehicle wraps, outdoor signage) to prevent lifting.
- Allow 24–72 hours for full adhesive cure before washing or exposing to rain.
What mistakes should you avoid?
Common vinyl application mistakes that cause problems:
- Rushing the prep: Skipping surface cleaning is the most common cause of failure.
- Wrong temperature: Applying vinyl in direct sunlight or cold garages leads to poor adhesion.
- 90° squeegee angle: This compresses the vinyl and traps air instead of pushing it out.
- Overstretching: Stretched vinyl is thinner and more prone to fading and failure.
- Skipping test application: Always test on a small area first, especially with new materials or unfamiliar surfaces.
When should you hire a professional?
DIY vinyl application works well for flat surfaces, simple graphics, and forgiving materials. For complex projects—full vehicle wraps, large storefront graphics, or precision fleet branding—professional installation services deliver more consistent results and often come with warranties.
Professional installers have climate-controlled environments, specialized tools, and the experience to handle curves, seams, and challenging substrates efficiently. The time and material savings often outweigh the installation cost.