Stencils: Your Secret Weapon for Awesome Sign Painting
Whether you are a DIY enthusiast or aiming to create professional-looking signage, stencils can transform your sign painting from amateur to polished. Here is everything you need to know about choosing, preparing, and using stencils effectively.
Key takeaways
- Mylar stencils are the most versatile choice—durable, pliable, washable, and reusable for dozens of projects.
- Metal stencils last for years and are ideal for high-volume or industrial sign painting applications.
- Surface prep is critical: clean, smooth, and dry surfaces prevent paint bleeding and ensure crisp edges.
- Apply thin paint layers from the edges inward, and remove stencils slowly while paint is still slightly tacky.
- Bay Area sign shops can help with custom stencil cutting and professional installation for complex projects.
Ever tried painting a sign freehand and ended up with wobbly letters and uneven edges? Stencils are the solution. They help you create crisp, professional-looking signs without years of brush control practice. Whether you are branding your San Jose storefront or creating directional signage for your San Francisco office, stencils make the process faster and more forgiving.
What type of stencil should you use for sign painting?
The right stencil material depends on your project scope, surface type, and how many times you need to reuse it. Here is a breakdown of your main options:
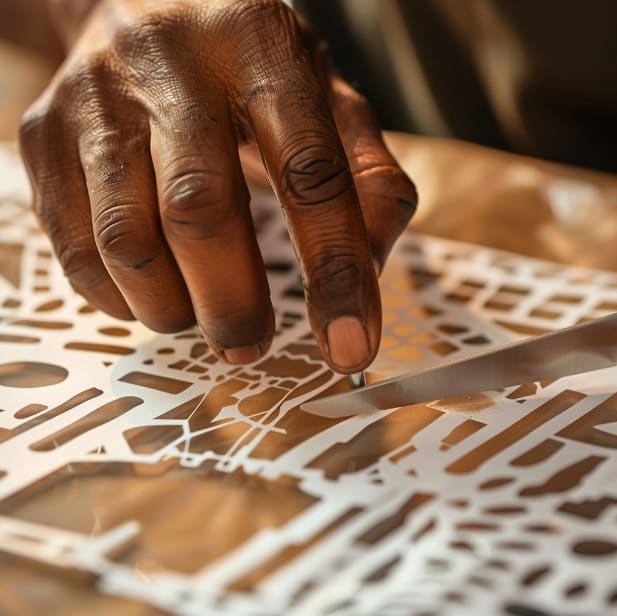
- Mylar (7.5–14 mil): The most common stenciling material for sign work. Mylar stencils are durable, pliable, and washable—perfect for projects requiring multiple uses. Thicker mylar (14 mil) handles heavy repeated use, while thinner grades (7.5–10 mil) conform better to slightly curved surfaces.
- Metal stencils: Precision-cut for perfect clarity and smooth edges. These industrial-grade stencils last for years and are ideal for high-volume branding, parking lot markings, or repeated use across multiple job sites.
- Adhesive-backed vinyl: Best for one-time applications where precision matters most. The adhesive creates an airtight bond that prevents bleeding, resulting in the crispest possible edges. Once removed, these stencils cannot be reused.
- Paper or oilboard: Budget-friendly for single-use projects. Paper stencils are inexpensive but tear easily and cannot withstand wet paint for long periods.
For most Bay Area sign projects—whether you are working on custom aluminum signs or painting directly on walls—mylar offers the best balance of durability, flexibility, and value.
How do you prepare a surface for stencil painting?
Surface preparation is the difference between amateur and professional results. Follow these steps before placing your stencil:
- Clean thoroughly: Remove dust, grease, and debris. Any contaminants will interfere with paint adhesion and can cause bleeding under the stencil edges.
- Smooth the surface: Sand rough spots and fill any holes or imperfections. Uneven surfaces make it difficult for the stencil to lay flat.
- Ensure complete dryness: Wait until the surface is bone dry. Moisture trapped under the stencil or mixed with paint creates adhesion failures and blurry edges.
How do you position a stencil correctly?
Precise placement prevents costly mistakes and rework. Measure twice, paint once:
- Measure and mark: Use a level or laser guide for alignment. Mark reference points with light pencil marks or painter's tape.
- Secure the stencil: For non-adhesive stencils, use repositionable spray adhesive or painter's tape around all edges. The stencil must not shift during painting—even a small movement creates double edges.
- Test the fit: Before committing to paint, step back and verify spacing, centering, and levelness.
What is the best technique for painting through a stencil?
The painting technique matters as much as the stencil quality. According to Stencil Ease's material guide, matching your paint application method to your stencil thickness delivers the cleanest results.
- Choose the right paint: Acrylic paint works best for indoor signs—fast drying, easy cleanup, and low odor. Enamel paint is better for outdoor applications because it resists UV damage and weathering.
- Apply thin layers: Multiple thin coats beat one thick coat every time. Thick paint pools at stencil edges and bleeds underneath. Let each layer dry before adding the next.
- Work from edges inward: Start your brush or roller strokes at the stencil edge and move toward the center. This pushes paint away from the edges rather than under them.
- Spray straight down: If using spray paint, hold the can perpendicular to the surface. Angled spraying pushes paint under the stencil edges.
When should you remove the stencil?
Timing the stencil removal is critical. Remove it while the paint is still slightly tacky—not wet, not fully dry:
- Too early: Wet paint runs and drips, smearing your clean edges.
- Too late: Dried paint forms a skin that tears when you lift the stencil, leaving ragged edges.
- Just right: When paint is tacky but not sticky, lift the stencil slowly and steadily at a 45-degree angle.
How do you finish and protect stenciled signs?
After removing the stencil, inspect your work and apply protective coatings as needed:
- Touch up imperfections: Use a fine brush to fix any minor bleeding or gaps. Work carefully—over-touching can make fixes more visible than the original flaws.
- Apply a clear coat: For outdoor signs, a clear protective finish extends paint life significantly. UV-resistant clear coats prevent fading, while polyurethane adds scratch resistance.
- Clean your stencils: If using reusable mylar or metal stencils, clean them immediately after use. Dried paint is much harder to remove and can damage the stencil.
When should you hire a professional sign shop?
Stencils make sign painting accessible, but some projects benefit from professional expertise. Consider working with a sign shop like SF Bay Signs when your project involves:
- Large-scale applications where alignment precision matters across multiple feet
- Complex multi-color designs requiring registration between layers
- Specialty substrates like acrylic, brushed metal, or textured surfaces
- High-visibility locations where imperfections would be obvious
- Regulatory signage that must meet specific standards
Professional sign shops have access to precision cutting equipment for custom stencils, plus the experience to execute complex projects efficiently. We also offer complete installation services throughout the Bay Area.
Ready to start your sign project?
Stencils turn sign painting from an intimidating craft into an achievable DIY project. With the right stencil material, proper surface prep, and careful technique, you can create professional-looking signage for your home or business.
For projects that need custom stencil cutting, specialty materials, or professional execution, contact SF Bay Signs. We help Bay Area businesses and organizations create effective, durable signage—from initial concept through final installation.