How to Drill Holes in Acrylic Signs Without Cracking
Acrylic cracks easily when drilled incorrectly. This guide covers the right drill bits, speed settings, and techniques professional sign shops use to drill clean mounting holes every time.
Key takeaways
- Use drill bits designed for plastic—standard twist bits catch and crack acrylic.
- Start with a small pilot hole and enlarge gradually to prevent stress fractures.
- Keep drill speed low and apply gentle pressure—heat from friction causes cracking.
- Leave masking film on during drilling for added protection.
- Keep holes at least 1.5× the hole diameter away from edges to avoid chipping.
Drilling holes in acrylic signs seems straightforward—until you end up with a cracked mess. Acrylic (also called plexiglass or Perspex) is a popular material for custom acrylic signs because it looks sleek and professional, but it requires specific drilling techniques to avoid damage.
This guide covers everything you need to know about drilling clean mounting holes in acrylic signs, from choosing the right drill bit to finishing the holes properly.
Why does acrylic crack when drilled?
Acrylic cracks during drilling primarily because of heat buildup. Friction from the drill bit generates heat, and acrylic expands when heated. This thermal expansion creates internal stress that results in cracks radiating from the hole.
The other major cause is using the wrong drill bit. Standard twist drill bits have cutting angles designed for metal, which catch and grab acrylic rather than cutting cleanly. This grabbing action creates mechanical stress that causes the material to fracture.
What tools do you need to drill acrylic?
Successful acrylic drilling requires the right equipment. Here is what professional sign shops use:
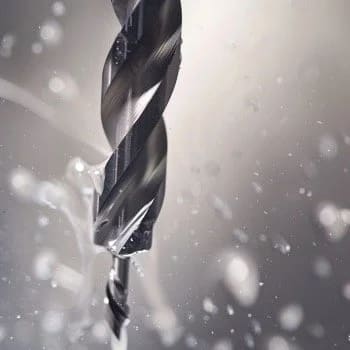
- Drill bits for plastic: Specially ground bits with modified cutting angles that scrape rather than cut. Röhm, the manufacturer of PLEXIGLAS®, recommends spiral bits with geometry specifically designed for acrylic.
- Brad point bits: An alternative that centers easily and cuts cleanly in acrylic.
- Step drill bits: Excellent for thin sheets; create clean, score-free holes.
- Clamps: Secure the acrylic to a flat wooden base to prevent movement.
- Masking tape: Apply over drill points for extra crack protection.
- Spray bottle with water: For cooling during drilling.
- Safety glasses: Acrylic chips can be sharp.
- Fine sandpaper or countersink: For deburring finished holes.
How do you drill acrylic without cracking it?
Follow this step-by-step process used by professional sign fabricators:
Step 1: Keep the masking film on
Do not remove the protective film from your acrylic sheet before drilling. This film provides an extra layer of protection against surface scratching and helps prevent chipping around the hole.
Step 2: Mark your hole locations
Use a permanent marker or grease pencil to mark exact drilling points on the masking film. Double-check measurements before drilling—maintaining at least 1.5× the hole diameter from any edge prevents edge cracking.
Step 3: Secure the acrylic sheet
Clamp the acrylic to a flat wooden base. The backing support prevents the material from flexing during drilling and provides a clean exit for the drill bit. Never drill acrylic while holding it in your hands.
Step 4: Apply masking tape over drill points
Even with the protective film in place, adding masking tape over drill points provides an extra barrier that reduces the risk of surface tearing.
Step 5: Start with a pilot hole
Begin with a small pilot hole (about 3mm) before drilling your final size. This starter hole guides the larger bit and distributes stress more evenly, significantly reducing crack risk.
Step 6: Use low speed and gentle pressure
Set your drill to a low speed setting. As a general rule, larger holes require slower speeds. Let the drill do the work—pressing hard generates heat and causes cracks. The ideal drilling produces smooth, continuous shavings rather than crumbly chips or melted material.
Step 7: Cool and clear debris periodically
For sheets thicker than 5mm, pause periodically to spray water into the hole and clear accumulated shavings. Heat buildup is the primary cause of drilling failures, and cooling prevents it.
Step 8: Slow down before breakthrough
Reduce feed pressure just before the drill exits the back side. This prevents chipping and blowout on the exit side of the hole.
Step 9: Deburr the holes
Use a countersink or fine sandpaper to smooth both sides of each hole. This removes sharp edges and small notches that can become stress points over time.
Cast vs. extruded acrylic: Does it matter for drilling?
Yes. Cast acrylic is more forgiving during drilling—it machines more predictably and is less prone to cracking. Extruded acrylic costs less but has internal stresses from the manufacturing process that make it more susceptible to cracking during drilling.
If you are drilling mounting holes in signs that need to look professional, cast acrylic is worth the extra cost. For test pieces or less critical applications, extruded acrylic works with extra care.
Common mistakes that crack acrylic signs
Avoid these frequent errors:
- Using standard metal twist bits: Their aggressive cutting angles catch and crack acrylic.
- Drilling too fast: High RPM generates heat that causes thermal cracking.
- Applying too much pressure: Let the bit cut at its own pace.
- Skipping the pilot hole: Starting with your final size bit increases crack risk significantly.
- Drilling too close to edges: Keep holes at least 1.5× the diameter away from edges.
- Drilling unsupported material: Always back acrylic with a solid surface.
When to let professionals handle it
While drilling a few mounting holes is manageable as a DIY project, certain situations benefit from professional fabrication:
- Large signs requiring multiple precisely aligned holes
- Thick acrylic (over 10mm) that requires specialized equipment
- Signs where crack-free results are critical for appearance
- Projects requiring countersunk or threaded holes
Our shop handles acrylic sign fabrication and professional installation for Bay Area businesses. If you need mounting holes drilled with precision, we can include that in your sign order.
Ready to create your acrylic sign?
Whether you are drilling mounting holes yourself or need professionally fabricated acrylic signage, we can help. Start your project with SF Bay Signs and get expert guidance on materials, mounting options, and installation.